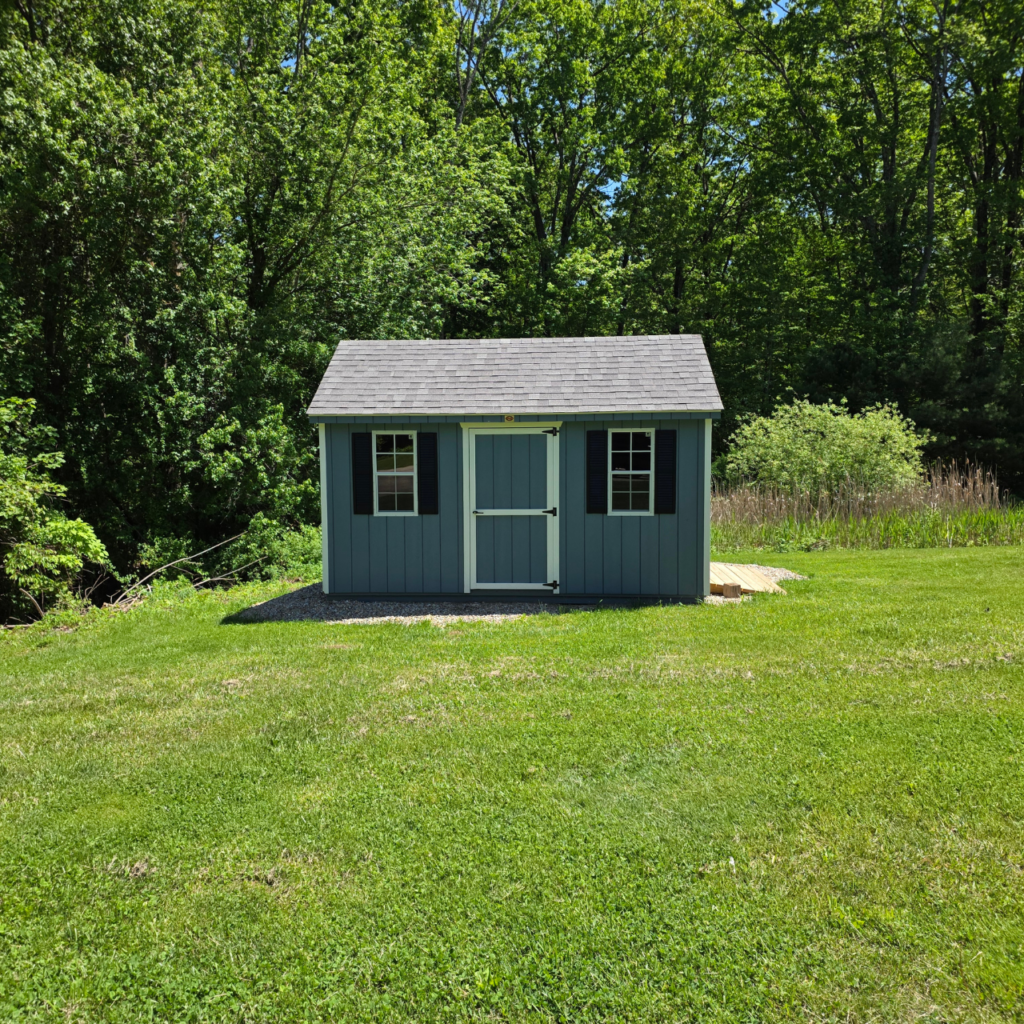
Shed pad installation is the work of building a level, compacted, free-draining base under a shed or outbuilding so the building stays square, dry, and still through New England freeze-thaw. It strips the soft organic soil off the spot, digs down to firm subgrade, rebuilds the area in compacted structural stone, and finishes it level with just enough pitch to move water away. It is the same work we do every week through our gravel installation and driveways service across Central Massachusetts.
Most people think of a shed as the thing you buy and the pad as a formality. It is the other way around. The building is a kit a crew assembles in a day, and the pad decides whether that building is still level in ten years. Shed pad installation is a small piece of gravel installation done at a scale where every mistake shows up fast, because a small building has no weight and no depth to hide a bad base.
This guide covers what shed pad installation actually is, how the stone base gets built, how big the pad should be, how drainage and pitch are handled, how sloped ground changes the job, and the frost, permit, and wetland rules Massachusetts adds on top.
What Is Shed Pad Installation, Exactly?
Shed pad installation is the construction of an engineered stone base sized and shaped for a specific outbuilding. The finished pad is a rectangle of compacted crushed stone, usually a few inches thick over firm subgrade, cut level across its surface, contained at the edges, and set slightly proud of the surrounding ground so water runs off it rather than into it.
The word installation is carrying weight there. A pile of stone dumped on a lawn is not a pad. Shed pad installation happens in stages: the sod and topsoil come off, the subgrade gets checked and compacted, stone goes in and gets compacted in layers, and the surface is cut to a level a builder can work to. Each stage exists to solve a specific failure.
The distinction homeowners tend to miss is between a level surface and a stable surface. Raking stone flat over soft ground produces a level surface for about one winter. Shed pad installation produces a stable one, because the load path runs from the building down through compacted stone into ground that was proven firm before anything was stacked on it.
Sheds, run-in sheds, garden buildings, wood storage, generator platforms, container offices, and small detached garages all sit on the same principle at different sizes. What changes between them is the depth of stone, the size of the pad, and how much the subgrade has to be improved first.
Why Small Buildings Move When the Ground Under Them Is Wrong
A shed is light, and that is exactly the problem. A house has enough mass, and a foundation deep enough, to resist the ground pushing on it. A small building has neither. It rides on whatever is directly under it, so it follows every seasonal movement of the top eighteen inches of soil.
Frost is the engine. Water held in fine soil expands when it freezes and the ground lifts. If one corner sits on drainy sand and another on wet clay, those corners lift by different amounts at different times. The building racks, and doors that closed in October bind in January and never quite close again.
Organic soil adds a second failure that has nothing to do with frost. Topsoil, roots, and leaf litter are compressible and they decompose. A building set on that layer settles slowly and unevenly for years, which is why so many sheds develop a permanent lean long after the last hard winter.
The third failure is surface water. A shed on grade sits in whatever puddles around it, so the bottom plate wicks, the floor frame rots, and fasteners rust from the underside where nobody looks. Shed pad installation is worth doing because one intervention prevents all three failures at once.
Stripping Organic Soil and Reaching Firm Subgrade
The first real step in shed pad installation is excavation. Sod, topsoil, roots, and any soft fill come off the footprint and go somewhere else. This is not cosmetic. Everything above the mineral soil is compressible and biodegradable, and leaving any of it under a pad guarantees settlement.
How deep that goes is a site answer, not a number from a catalog. Some spots reach firm mineral soil in four inches. Others hide a foot of old fill, a buried stump, a filled-in trench, or a soft wet layer that keeps going. The digging stops when the ground stops moving under the machine and under a boot, not when a tape says it should.
When the subgrade is soft, it gets fixed rather than covered. Sometimes that means digging deeper and replacing the soft material with structural stone. Sometimes it means geotextile fabric between soil and stone so the two never mix. Fabric is cheap, and it is the difference between a pad that stays clean and one whose stone slowly disappears down into mud.
This stage is foundation excavation logic at a smaller scale and it deserves the same respect. Every layer above inherits its quality, so shed pad installation that skips the subgrade check produces a perfectly compacted base that settles anyway.
Choosing the Right Stone for a Gravel Shed Pad
Not all gravel does the same job. The material used for shed pad installation has to lock together under compaction, carry load, and let water pass. That combination points to angular crushed stone with a graded mix of particle sizes, commonly called processed gravel or dense grade, rather than smooth round pea stone.
Angular pieces knit. Their faces catch on each other and the mass behaves almost like a slab. Round stone rolls under load no matter how hard it is compacted, which is why a pea stone pad feels loose forever and why a shed set on one develops ruts under its skids.
The graded mix matters as much as the shape. A blend running from larger stone down through fines fills its own voids during compaction and reaches a far higher density than single-size stone can. That density is the load-carrying capacity, and it is what keeps a heavy building from pressing its bearing points into the base.
Most shed pad installation uses two materials: a coarser base course for structure and drainage, then a finer surface course cut level for the building to sit on. It is the layered logic behind a gravel driveway installation, scaled down and held to tighter tolerance because a building, unlike a truck, cannot flex.
Compaction Is the Step That Decides Everything
Loose stone dumped into a hole is not a base. It is a base waiting to become one, and the compactor makes the conversion. Compaction drives the particles together, removes air voids, and turns a pile of loose material into a dense mass that carries load and resists frost.
The technique that separates good shed pad installation from bad is compacting in lifts. Stone goes in a few inches at a time and each layer is compacted before the next is added. A plate compactor or roller only transmits its energy so far down. Dump the full depth at once, run the machine over the top, and the bottom half stays loose while the surface looks finished.
That hidden loose layer is the most common defect in a failed pad, and it is invisible at handover. The shed goes up on a surface that looks perfect. Over the following year the bearing points press down through the uncompacted zone and the building settles unevenly, and nobody connects the lean to a step skipped before the stone was ever raked.
Moisture matters too. Bone-dry stone will not compact well and neither will saturated stone. Slightly damp material densifies best, which is why shed pad installation on a dusty day often starts with wetting the material rather than simply running the compactor longer.
Sizing the Pad Beyond the Building Footprint
A pad built exactly to the size of the shed starts eroding on day one. Standard practice in shed pad installation is to extend the stone past the building on every side, typically a foot or two, so the drip line from the roof lands on stone instead of on soil at the edge of the base.
Without that margin, roof runoff carves a trench around the perimeter. The trench collects water, undermines the pad edge, and washes base material out from under the corners. The building ends up sitting on a mesa with eroding sides. Sheds without gutters shed a surprising volume of water in a New England downpour, all of it concentrated along two lines.
The overhang also creates a working apron. It gives a mower somewhere to run without scalping, keeps grass and weeds off the wall, and provides dry footing at the doors where the traffic is. For buildings with a ramp or a wide door, the pad usually runs further out on that side to carry the approach.
Edge containment is the other half of sizing. A pad with no defined edge spreads and thins as stone migrates outward. Shed pad installation therefore finishes with timbers, buried edging, or a compacted shoulder of the same material, so the pad still measures what it measured the day it was built.
Pitch, Drainage, and Where the Water Actually Goes
Shed pad installation leaves the pad level in the sense that matters to the building and pitched in the sense that matters to water. The surface the building sits on is cut flat and true. The ground around it, and often the pad itself across its width, carries a slight fall so water keeps moving.
The pad should also sit slightly high relative to the surrounding grade. A pad built flush with the lawn becomes a basin during a thaw. A pad an inch or two proud sheds water outward and stays dry underneath, which is the entire point of building it from free-draining stone in the first place.
Where the water goes next is a site design question. On open ground with fall available, shaping the surrounding grade is enough. On flat ground, or at the base of a slope, shed pad installation may need a swale above the pad to intercept water crossing the property before it ever reaches the building.
When a pad sits in genuinely wet ground, drainage stops being an accessory and becomes the job. A shed set where the ground ponds every spring needs the water handled before the pad goes in, otherwise the stone becomes a sponge sitting in a puddle. That is drainage work rather than gravel work, and it is worth solving first.
Gravel Pad or Concrete Slab for an Outbuilding
Homeowners often assume concrete is the upgrade and gravel is the compromise. For most sheds and light outbuildings that is backwards. A compacted stone pad drains, tolerates frost movement, costs less to build, and can be adjusted or extended later. A slab does none of those things easily.
A slab is rigid, and rigid is only an advantage when it is supported perfectly and uniformly. A slab poured on a poor base cracks, and a cracked slab is permanent. A stone pad from a proper shed pad installation that settles slightly can be lifted, re-leveled, and re-compacted in an afternoon.
A slab also holds water against the wood it touches, which is why so many older sheds rot along the bottom plate where it meets concrete. Shed pad installation drains water away from the wood, and a shed on skids over stone has air under it. That single detail extends the life of the building more than most upgrades a homeowner can buy.
Concrete earns its place when the floor is the work surface: a garage with vehicle traffic, a shop with machinery bolted down, or a building with plumbing through the floor. Even then the slab needs a compacted stone base under it, so the pad work does not disappear. It just gets buried.
Shed Pad Installation on Sloped Ground
Central Massachusetts is not flat, and the spot a homeowner wants a shed is often the spot that is not usable for anything else, which usually means it slopes. Shed pad installation on a grade is a different job from shed pad installation on a lawn, and the difference is retaining and drainage, not stone.
The pad has to be carved into the hill on the uphill side and built up on the downhill side. That cut-and-fill balance decides everything. Fill is only as good as its compaction, so the built-up side gets constructed in lifts exactly like the base, and it usually needs more depth than the cut side to reach the same stability.
The downhill edge then has to be held, and this is where shed pad installation on a slope earns its cost. Depending on height, that is a timber wall, a block wall, a stone shoulder, or a slope gentle enough to hold vegetation. Without containment the fill side sloughs, and the corner of the building sitting on it goes with it.
The uphill side needs water management. A cut into a slope intercepts everything running down that hill and delivers it to the back wall of the building. A swale or a shallow interceptor above the pad sends that water around instead. Skipping it turns the pad into a catch basin every time it rains hard.
Shed Pad Installation for Garages, Containers, and Larger Outbuildings
The principles scale but the numbers change. A garden shed spreads a modest load over a wide footprint. A detached garage, a container building, or a barn concentrates far more weight, often through a small number of bearing points, and shed pad installation has to be built to match.
Shipping containers are the sharpest example. All the weight rides on four corner castings, so the load per square inch at those points is enormous. A container set on a thin pad presses its corners straight down through the stone and racks the doors, which is the first symptom every time. Container pads need extra depth and often bearing pads at the corners.
Larger buildings also need the pad approached. A garage needs a driveway, a barn needs equipment access, and a remote outbuilding often needs a stone access road just to get materials to the site. That approach is part of the project, not an afterthought, and it is usually built in the same visit while the machine and the stone are already there.
Where the outbuilding will hold vehicles or equipment, shed pad installation often grows into a gravel parking area so there is somewhere to stage what comes out of the building. Sizing that up front is far cheaper than adding it later, because the machine, the stone, and the trucking are all already mobilized.
Access, Equipment, and Getting Stone to the Spot
Shed pads land in awkward places. Back corners of yards, spots behind the house, patches carved out of the tree line, and areas reached only across a lawn the homeowner would like to keep. Access shapes how shed pad installation gets done and sometimes shapes where the pad can reasonably go.
A compact machine and a stone cart reach places a triaxle cannot. When a truck cannot back to the spot, stone gets stockpiled where it can be dumped and carted in. That is slower, and it is the honest reason two pads of the same size can be very different jobs.
Protecting what is already there is part of the plan. Lawns get worked dry rather than saturated, mats or plywood go down over the softest crossings, and the route in avoids septic components, leach fields, wells, and shallow utility runs. A pad is not a win if it arrives with two hundred feet of ruts.
Tree roots deserve a mention. A pad cut in tight to mature trees severs roots on that side, and enough root loss destabilizes a tree that then leans over the building it stands next to. Moving a pad a few feet is usually the cheaper answer to that problem.
What Shed Pad Installation Looks Like on the Ground
The sequence is consistent even when the site is not. The location gets confirmed against setbacks, trees, drainage patterns, and how the building will actually be used, since a door facing the wrong way is a permanent annoyance. The footprint gets laid out and marked, with pad dimensions set beyond the building on every side.
Utilities get marked before anything digs. Then the organic material comes off, the subgrade is checked and compacted, and any soft areas get excavated deeper and replaced. Fabric goes down where the soil warrants it, and only then does the stone side of shed pad installation begin.
Stone comes in and builds up in lifts, each one compacted before the next. The surface is cut to level, checked across both diagonals, and compacted again. Edges get contained, the surrounding grade is shaped to move water away, and the disturbed ground around the work gets cleaned up and restored.
Shed pad installation is typically a single day for a straightforward pad on reachable ground, longer when the subgrade fights back, the slope needs retaining, or access requires carting. It is not a long project. It is a project where the value is concentrated in steps that are invisible once the shed is standing on top of them.
Signs an Existing Shed Pad Has Failed
Doors and windows tell the story first. A door that used to swing and latch cleanly and now catches at one corner means the building is out of square, and a building goes out of square because its base moved. On a shed, that is almost always the shed pad installation rather than the building.
Look at the perimeter next. A trench worn along the drip line, stone visibly thinner at the edges than the middle, or soil washed over the stone all say the pad is too small or has no edge containment. Grass and weeds growing up through the middle usually mean soil has migrated into the stone, which means fabric was skipped during shed pad installation.
Underneath is the honest test. Standing water under the building after a storm, damp or dark bottom framing, or a musty smell inside on a dry day all point to a pad that is not draining or is sitting too low relative to the ground around it.
Most of these are repairable without moving the building. A pad can be re-edged, topped up, re-compacted around the perimeter, and re-graded. A failed subgrade under the whole footprint is the exception, and that one means lifting the shed and redoing the shed pad installation properly.
When Shed Pad Installation Fits the Massachusetts Season
The practical window in Central Massachusetts runs from the point frost leaves the ground in spring until it goes back in, roughly late April through November in a normal year. Within that window the best conditions are dry ones, because both compaction and lawn protection depend on soil that is not saturated.
Spring is popular because homeowners are planning outdoor projects, but early spring is often the worst soil condition of the year. Thawing ground is soft well below the surface, subgrades will not compact, and a machine crossing a wet lawn does damage that lasts all season.
Late summer and early fall are the sweet spot for shed pad installation. Soil is at its driest, compaction is easy, and a pad built in September has the whole autumn to settle in before winter, with the shed up and loaded before the first hard freeze.
Frozen ground ends the season. Frozen soil cannot be compacted, frozen stone will not densify, and a pad built on frozen subgrade settles the moment it thaws. Shed pad installation late in the year happens before the ground closes, not after.
In Massachusetts, Watch Out for These
Call before you dig, every time. Massachusetts law defines excavation broadly, and MGL Chapter 82 Section 40 includes the movement or removal of earth or rock, digging, trenching, grading, and augering in that definition. Stripping soil for shed pad installation is excavation under the statute even though it is shallow, and shallow is exactly where irrigation lines, invisible fence, septic components, and shed power runs live.
The notice is free and it is not optional. Contact Dig Safe by calling 811 and give at least 72 hours of advance notice before digging, not counting weekends or legal holidays, as described in the state guide to Dig Safe. The same statute expects the excavation area to be premarked in white paint or white stakes so locators know where to work.
Design for a 48 inch frost depth. That is the standard Massachusetts frost line, and it is why shed pad installation builds a pad to drain rather than building it to reach below frost. A gravel pad works with frost by removing the water that makes frost destructive, which is a very different strategy from a footing that goes under it.
Check wetlands before siting the building. The Massachusetts Wetlands Protection Act, MGL Chapter 131 Section 40, requires written notice to the local conservation commission before anyone removes, fills, dredges, or alters a wetland resource area, and jurisdiction generally reaches 100 feet out from a bordering vegetated wetland. Details are on the state page for protecting wetlands in Massachusetts. Shed pad installation inside that buffer is a filing, not a judgment call.
Ask the town about permits and setbacks before the stone is ordered. Under MGL Chapter 143 Section 3, every city and town employs a building commissioner or inspector of buildings who administers and enforces the state building code locally, so the permit answer for an accessory building comes from that office. Zoning setbacks are separate and also local, and they are the rule most often discovered after a shed is already standing in the wrong place.
Watch the septic system. A shed placed over a leach field or a reserve area is a problem that surfaces at the worst possible time, usually during a title inspection or a system failure. The as-built plan is on file with the local board of health, and checking it takes one phone call.
Frequently Asked Questions About Shed Pad Installation
How thick should a gravel shed pad be?
For a typical backyard shed on firm ground, four to six inches of compacted crushed stone over a proven subgrade is the working range. Soft or wet subgrade, heavier buildings, and container structures all call for more depth. The real answer comes from what the ground turns out to be once the topsoil is off, which is why shed pad installation starts with digging rather than with a number.
How much bigger than the shed should the pad be?
Extend the stone about one to two feet past the building on every side. That margin catches the roof drip line on stone instead of soil, prevents a trench forming around the perimeter, and gives you dry footing and a mowing edge. Pads usually run further out on the door or ramp side.
Do I need a permit for a shed in Central Massachusetts?
It depends on the size of the building and on your town. The state building code is administered locally by your building commissioner or inspector of buildings, and zoning setbacks are a separate local rule. One call to the building department in Grafton, Worcester, Shrewsbury, or Northborough answers both before you order anything.
Is a gravel pad better than concrete for a shed?
For most sheds and light outbuildings, yes. Gravel drains, tolerates frost movement, and can be re-leveled if it ever settles, while a slab cracks if its base fails and holds moisture against the bottom of the building. Concrete makes sense when the floor itself has to be a hard work surface.
When is the best time of year for shed pad installation in Massachusetts?
Late summer and early fall are ideal in Central Massachusetts because soil is dry, compaction is easy, and lawns survive the equipment. Early spring is the hardest window, since thawing ground will not compact properly. The season closes once frost is in the ground, because a pad built on frozen subgrade settles as soon as it thaws.
Getting Shed Pad Installation Done on Your Property
Shed pad installation is a small project with a long tail. Built right, nobody thinks about it again and the building it carries stays square for its whole life. Built wrong, it shows up as a stuck door in year two and a rebuild in year five, and the shed usually gets blamed for something the ground did.
D&M Good Construction handles shed pad installation across Grafton, Worcester, Shrewsbury, Northborough, and the surrounding Central Massachusetts towns as part of our gravel installation and driveways work. We look at the spot, the soil, the access, and where water moves before quoting anything, because those four things determine the job.
If you are planning an outbuilding, or you have one already leaning on ground that gave up, tell us what you are working with and we will walk the site with you. Our estimates are always free.